The development of athletes calls for a coach to address critical aspects of strength and conditioning. Athletes must improve their absolute strength, explosive power, speed, and overall conditioning to advance in the quest to enhance sports performance. This means athletes will not only need to use common training tools such as barbells and dumbbells, but additional training devices will also be necessary.
The sled is one of the most valuable pieces of equipment an athlete or coach can have at their disposal. Sled training can be manipulated and implemented in different ways to deliver a multitude of training benefits. Depending on the exercise programming, the sled can be used to improve strength, explosive power, and conditioning.
Additionally, the sled is of tremendous benefit to the injured athlete. When used as a rehabilitation tool, the sled can be used to recover from upper-body, spine, or lower-body injuries.
Considering many sled exercises can be performed from the standing position, this training allows athletes to load the muscles and joints to experience resistance, all without the risk of training at disadvantageous or painful joint angles. If the athlete can walk, the sled can accelerate the rehabilitation process and help an athlete return to prior performance levels faster.
At Westside, we have used sleds for many years to achieve all the above training goals. In those years, we developed strategies to help athletes improve their strength, explosive power, and conditioning or assist in recovery from injury.
Here is the way we approach sled training at Westside Barbell.
Types of Sleds
Before we move into talking about exercise programming and execution, it is essential to talk about the common types of sleds that can be found in many strength and conditioning-focused gyms. While all sleds train similar muscle groups, the sled's design can change the joint angles, thus slightly altering the overall training effect.
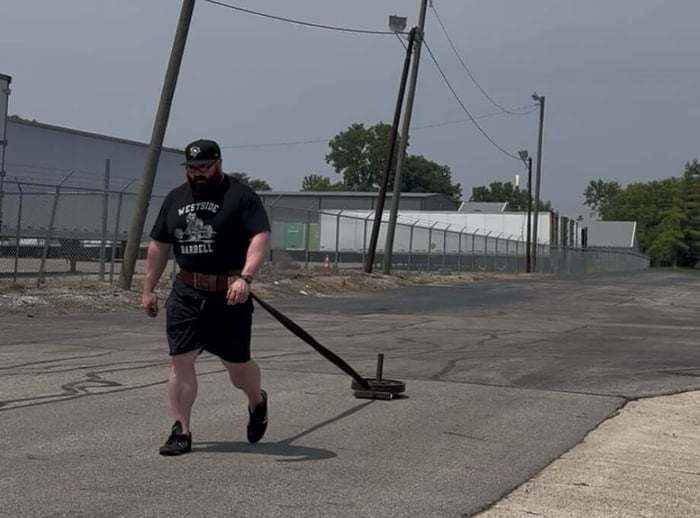
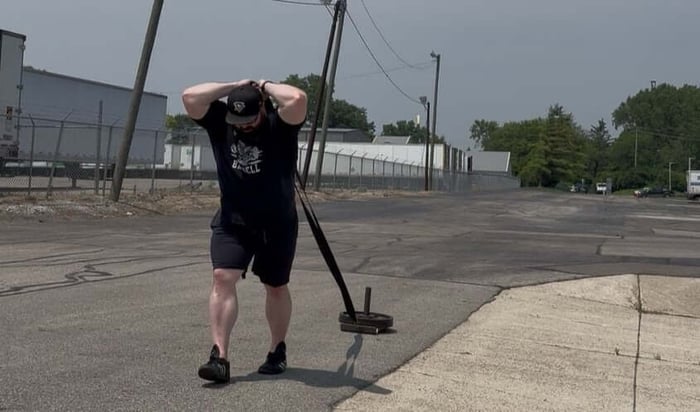
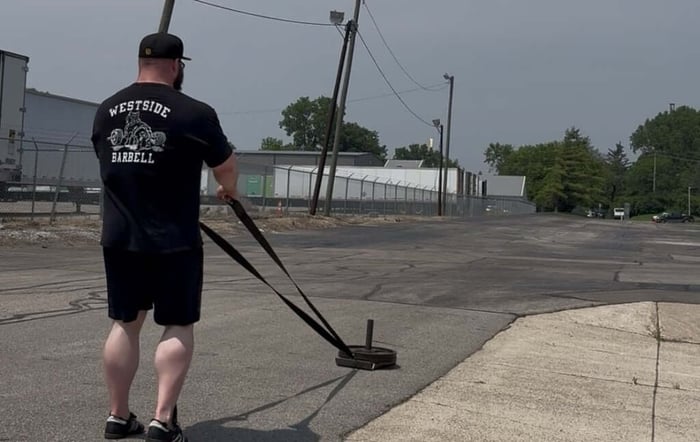
The most common type of sled is the basic pull sled. This sled is typically a basic design, with just a sled, a post to load weight onto, and an attachment point for a pulling strap. Not only is this sled the most common type of sled found in many gyms, but this is also the most commonly used sled at Westside Barbell.
The second most common type of sled is the push sled. As the name suggests, this sled is made for pushing. The design will have similar features to the pull sled, with uprights added to allow athletes to use their arms or torso to drive the sled forward. If you are familiar with the CrossFit Games, this design is used as the competition sled.
The third most common type of sled is a wheeled sled. These sleds are often found in facilities that do not have access to outdoor areas to train, leaving turf or matting as the only surface available for sled work. The wheeled sled offers similar training benefits to the pull or push sled, the only difference being the complexity of the design.
Wheeled sleds typically use a combination of loaded plate weight and brakes to cause friction and provide resistance. While these designs are useful, achieving optimal resistance can be a bit more complicated than using a typical pull or push sled.
Sled Exercises
Now that we have gone over the basic sled designs, it is time to begin discussing the exercises that can be performed using these sleds. As we advance, we will discuss different types of pushing or pulling exercises without listing wheeled sleds specifically.
Remember, if you only have access to a wheeled sled, you can still perform all of the exercises discussed below.
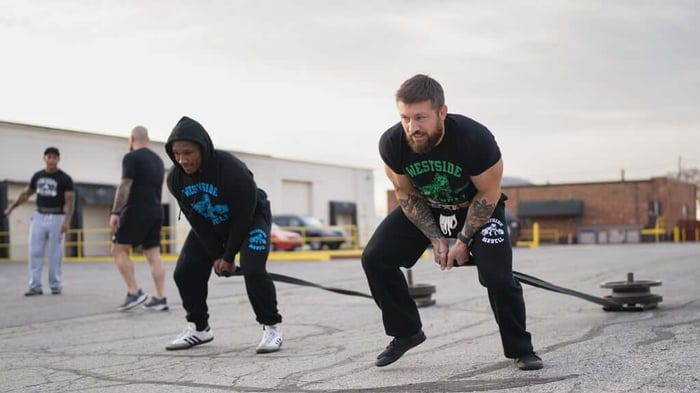
The first and most common sled exercise at Westside Barbell is the basic sled pull. This exercise can be executed by pulling the sled forward, backward, or stepping from side to side. Pulling a sled will help develop lower body muscle groups and improve GPP. This exercise is typically performed for 10-12 trips, 25-50 yards per trip.
The basic sled push workout is the next exercise we use when training with a sled. This exercise is performed using either the arms or the upper torso to drive the sled forward. Depending on how the exercise is performed, this exercise can be of benefit to both the upper and lower body.
Athletes can use their arms to push the sled, similar to a bench press, which greatly emphasizes the arms and upper torso. Athletes can also choose to perform the exercise with the arms extended, using the trunk and lower body to drive the sled forward. This exercise is a great way to develop strength and work capacity and is typically performed for 10-12 trips, 15-25 yards per trip.
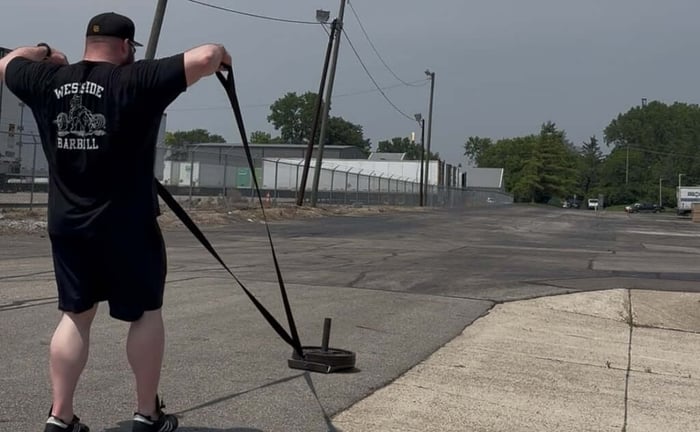
Another common exercise we use is the sled press. This exercise is focused on the upper body, calling for the athlete to step forward to bring tension into the pull straps, then using the arms and upper torso to press the weight forward. Instead of assigning distance to upper body exercises, we typically count reps. When performing the sled press, athletes will perform 4-6 trips, 15-20 reps each trip.
The triceps can also be trained using a sled. For many years, we have used the sled to perform triceps extensions. Like the chest press, the athlete will walk forward to bring tension into the pull straps, then use the triceps to extend the weight forward. When using sled triceps extensions, athletes will perform 4-6 trips, 15-20 reps each trip.
We will also perform sled face pulls to target the upper back and posterior shoulder muscles. Similar to the press or triceps extension, the face pull calls for the athlete to bring tension into the pull straps, then perform a face pull to pull the sled. This exercise should also be performed for 4-6 trips, for 15-20 reps each trip.
Now that we have discussed the basic sled exercise we use at Westside Barbell, it is time to discuss how to properly load the sled to achieve specific training effects and results.
How to Properly Load a Sled
No matter the exercise, it is crucial to understand why you are performing it to know how to load the sled properly. Properly loading the sled is important to ensure an athlete achieves the intended training effect without incurring unnecessary fatigue or wasting time.
If the training focuses on explosive power training, specifically loading and extending the hip flexors, having a sled loaded with the heaviest weight the athlete can manage will make no sense. Conversely, if the intent is to improve the work capacity of a strongman for a heavy push event, it would make no sense to load the sled at levels appropriate for GPP training.
Knowing why you are performing the exercise will always tell you how to load a sled. The basic rule of thumb is to load the sled with a taxing weight while allowing the intended training effect to occur, with all sets fully completed using proper technical execution.
An excellent way to establish sled strength and fitness is to perform heavy sled pulls for a few sessions. This will help establish a max tolerance range as far as sled weight goes. From there, estimating and establishing weight ranges appropriate to improve explosive power is possible. Finally, drop the weight a bit, and this range of training intensity will likely be suitable for GPP training.
While we could prescribe specific percentages for each training focus, this can lead some athletes to confusion or failure. By following the process mentioned above, it is more likely that the athlete will be training with optimal training weight any time a sled is used.
We don't need to be pinpoint-specific with our sled training weights, but we want to avoid loading up as much weight as possible when a sled is used. The middle ground makes more sense, using a rational approach to ensure the athlete always uses weights that achieve the intended training effect without risking injury or wasting time.
Combining Exercises
Aside from being the main focus of an exercise, the sled can also be combined with other exercises to increase the difficulty and alter the training effect of the exercise. At Westside, we have frequently used a sled while walking a wheelbarrow, walking a yoke, carrying a safety squat bar, carrying a heavy KB or med ball, and carrying a barbell Zercher-style.
Combining exercises is a great way to raise the intensity of an exercise, further enhancing the strength and conditioning benefits associated with each exercise. However, these types of sled exercises should be reserved for athletes who have worked through the basic exercises and need additional stimulus to continue improving their strength and endurance.
It is not recommended that a beginner load up a sled and walk with a yoke or carry a loaded barbell in the Zercher position. These types of exercises require advanced levels of strength and coordination to perform. Combining an exercise with a sled without the prerequisite abilities greatly increases the risk of injury.
Introducing and Progressing Sled Training
In order to ensure sled-focused training is most effective, it is important to program the training properly. Fortunately, with the Conjugate Method, this is a simple process. Considering we already use a combination of methods to achieve specific training results, adding some additional sled training into an ongoing training program is no issue.
For athletes at the beginner level, we recommend starting with two sled exercises per week. Start with a GPP-focused sled pull performed at the end of the max effort lower training day. Then, a hypertrophy-focused upper body sled exercise such as sled triceps extensions at the end of the max effort upper training day.
With intermediate-level athletes, the sled training frequency will increase. Instead of two sled-focused exercises per week, we will now perform four sled exercises each week.
During max effort lower day, we will push a heavy sled with arms extended using the trunk and legs to drive the sled forward. On max effort upper day, we will perform 15-20 reps of heavy sled chest press. On dynamic effort lower days, the sled will be used to focus on GPP training, and during dynamic effort upper days, sled face pulls will be used to target the upper back and posterior shoulders.
At the advanced level, athletes will use sleds to focus on developing strength, explosive power, and GPP simultaneously.
During max effort lower days, athletes should push or pull a heavy sled for shorter distances. On max effort upper day, athletes will perform sled chest presses or triceps extensions focusing on speed and power output. On dynamic effort lower days, athletes will push a sled as fast as possible for 10-15 yds per trip, ten total trips to focus on explosive power. Finally, on dynamic effort upper day, athletes will pull a lighter sled for longer distances to focus on GPP training.
When programming for an advanced athlete, there are many options for a training focus or sled exercise. Combining exercises becomes an option at this level, as does changing the training focus or intended training effect depending on the athlete's current state.
With beginners or intermediates, it is best to stick with basic programming and exercise selection to allow the sled training to be properly integrated into the training program without causing excess fatigue. By keeping the programming basic, the beginner or intermediate athlete should have no issue performing or recovering from sled-focused training.
Beginner Sled Workout Plan
Week 1:
Max Effort Lower - sled pull, 12 trips, 30 yards per trip.
Max Effort Upper - sled chest press, 4-6 trips, 15-20 reps per trip.
Week 2:
Max Effort Lower - backwards sled pull, 10 trips, 25 yards per trip.
Max Effort Upper - sled tricep extensions, 4-6 trips, 15-20 reps per trip.
Week 3:
Max Effort Lower - sled push (lower body-focus), 8 trips, 20 yards per trip.
Max Effort Upper - sled face pulls, 4-6 trips, 15-20 reps per trip.
After three weeks, beginner athletes should repeat the program while slightly increasing the working weight used during each exercise.
Common Mistakes
Using a sled is pretty straightforward; however, there are a few issues to be mindful of. First, always remove the slack from the pull straps each time you walk or perform a rep. No matter the exercise, we want to achieve a consistent and even application of resistance. We do not want the pull strap to snap or cause a whiplash effect at any point.
Next, when pulling or pushing a sled, it is vital always to be mindful of posture. We want to maintain a neutral spine position with our trunk engaged adequately, whether pulling or pushing a sled. It is essential to avoid excessive hunching over, especially while pushing a sled, as this limits the expansion of the diaphragm and affects the athlete's ability to breathe correctly.
Another common mistake is escalating the difficulty of the exercises too quickly. Even with an advanced-level athlete, if the athlete has no prior experience pulling a sled, it is important to work through the beginner and intermediate levels. While advanced-level athletes will spend less time at the beginner and intermediate stages of sled training, it is vital to develop foundational skills first.
The final mistake most commonly made is loading the sled with too much or too little weight. As mentioned earlier, the sled can be used to target many different training goals. However, to bring about a specific training effect, the sled must be loaded appropriately. Always know your training intent, and load the sled to allow the training effect to occur.
Frequently Asked Questions
Q: How much does a typical sled weigh?
A: It depends on the type of sled. Our WSBB Unruly Sled weighs 26lbs. However, some push sleds can weigh 100lbs or more.
Q:Is it better to pull or push a sled?
A: Whether you are pulling a sled, pushing a sled, or stepping side to side with a sled, no option would be considered "better." It all depends on the athlete and current identified weaknesses or issues.
Q: Should strength athletes use a sled to focus on strength or GPP?
A: Both. The sled is a means to achieve various training effects, all of which can significantly benefit the strength athlete.
Q: Are wheeled sleds the only option for sled training on turf?
A: No, there are a few companies that make sleds that are similar to a basic pull sled intended for use on turf.
Q: When do you know it is time to move from beginner to intermediate or intermediate to advanced?
A: Generally, we recommend spending 10-12 weeks at the beginner level before moving on to intermediate-level sled training. This will allow you to get a feel for the impact sled training has on recovery. Advancing from intermediate to advanced happens once the athlete reaches elite performance levels in sports or the gym.
Q: What is the best surface on which to pull or push a sled?
A: Concrete or asphalt. The friction provided by these two surfaces provides the best training effect when using a sled.
A Diverse Training Tool
The sled is a training device that can be implemented in various ways. Whether we want to target submaximal working strength, improve explosive power, enhance cardiovascular output, or help an athlete return from injury, the sled is a tool that always comes in handy. Almost all sled exercises offer a high return on investment with a low impact on overall fatigue levels.
At Westside, we have used the sled on a weekly basis for years. Lou was a huge proponent of sled training for all the above reasons. He understood that a training tool that provided this level of utility was a tool that should be used regularly. Over the years, Lou improved the strength, explosive power, and GPP of many athletes using the sled. Additionally, he was a master of using the sled as a rehabilitation tool.
As the strength and conditioning market grows, many new products are being developed and released. Whether it be specialty barbells, equipment, supportive gear, or supplements, there is always something new and high-tech that promises to take strength and performance to the next level. However, it is important always to appreciate the power of simple training devices that have been proven to work for many years.
No matter if you are a high-performance athlete or an individual looking to get into better shape, the sled is a training tool that you will find helpful. Hate to run long distances? There is a sled exercise that can deliver a similar training effect. Need to lose weight? There is a sled exercise that can help burn additional calories. Recovering from a knee injury? There is a sled exercise that can help rebuild surrounding soft tissue and assist in rehabilitation.
Similar to how a Swiss army knife can be used to achieve a variety of basic tasks, the sled can be used to accomplish a variety of exercises to help an athlete regardless of their current abilities or circumstances. Pulling or pushing a sled is a fundamental movement pattern that can be performed by the least experienced athletes but can still provide significant benefits to the most experienced athletes.
A training tool this diverse belongs in the arsenal of any serious coach or athlete. Fortunately, sled training has become popular over the years, so you will likely have access to a sled at one of your local gyms. If so, don't let the sled collect dust in the corner. Decide your training intent, get the sled loaded up, and get to work. You'll be a better athlete for doing it.
Sources:
Simmons, L. (2007). Westside Barbell Book of Methods. Westside Barbell.
Verkhoshansky, Y., & Siff, M. C. (2009). Supertraining. Verkhoshansky.