Skip to content

Bogo Sale Now On- Buy any 2 shirts get 1 Free - Click Here

  • Instagram
  • YouTube
  • Currency
    • AlbaniaAlbania (ALL L)
    • AlgeriaAlgeria (DZD د.ج)
    • AndorraAndorra (EUR €)
    • AngolaAngola (USD $)
    • AnguillaAnguilla (XCD $)
    • Antigua & BarbudaAntigua & Barbuda (XCD $)
    • ArgentinaArgentina (USD $)
    • ArmeniaArmenia (AMD դր.)
    • ArubaAruba (AWG ƒ)
    • AustraliaAustralia (AUD $)
    • AustriaAustria (EUR €)
    • AzerbaijanAzerbaijan (AZN ₼)
    • BahamasBahamas (BSD $)
    • BahrainBahrain (USD $)
    • BangladeshBangladesh (BDT ৳)
    • BarbadosBarbados (BBD $)
    • BelgiumBelgium (EUR €)
    • BelizeBelize (BZD $)
    • BeninBenin (XOF Fr)
    • BermudaBermuda (USD $)
    • BoliviaBolivia (BOB Bs.)
    • Bosnia & HerzegovinaBosnia & Herzegovina (BAM КМ)
    • BotswanaBotswana (BWP P)
    • BrazilBrazil (USD $)
    • British Virgin IslandsBritish Virgin Islands (USD $)
    • BruneiBrunei (BND $)
    • BulgariaBulgaria (EUR €)
    • Burkina FasoBurkina Faso (XOF Fr)
    • BurundiBurundi (USD $)
    • CambodiaCambodia (KHR ៛)
    • CameroonCameroon (XAF CFA)
    • CanadaCanada (CAD $)
    • Cape VerdeCape Verde (CVE $)
    • Caribbean NetherlandsCaribbean Netherlands (USD $)
    • Cayman IslandsCayman Islands (KYD $)
    • ChadChad (XAF CFA)
    • ChileChile (USD $)
    • ChinaChina (CNY ¥)
    • ColombiaColombia (USD $)
    • ComorosComoros (KMF Fr)
    • Cook IslandsCook Islands (NZD $)
    • Costa RicaCosta Rica (CRC ₡)
    • CroatiaCroatia (EUR €)
    • CuraçaoCuraçao (ANG ƒ)
    • CyprusCyprus (EUR €)
    • CzechiaCzechia (CZK Kč)
    • DenmarkDenmark (DKK kr.)
    • DjiboutiDjibouti (DJF Fdj)
    • DominicaDominica (XCD $)
    • Dominican RepublicDominican Republic (DOP $)
    • EcuadorEcuador (USD $)
    • EgyptEgypt (EGP ج.م)
    • El SalvadorEl Salvador (USD $)
    • Equatorial GuineaEquatorial Guinea (XAF CFA)
    • EstoniaEstonia (EUR €)
    • EswatiniEswatini (USD $)
    • EthiopiaEthiopia (ETB Br)
    • Falkland IslandsFalkland Islands (FKP £)
    • Faroe IslandsFaroe Islands (DKK kr.)
    • FijiFiji (FJD $)
    • FinlandFinland (EUR €)
    • FranceFrance (EUR €)
    • French GuianaFrench Guiana (EUR €)
    • French PolynesiaFrench Polynesia (XPF Fr)
    • GabonGabon (XOF Fr)
    • GambiaGambia (GMD D)
    • GeorgiaGeorgia (USD $)
    • GermanyGermany (EUR €)
    • GhanaGhana (USD $)
    • GibraltarGibraltar (GBP £)
    • GreeceGreece (EUR €)
    • GreenlandGreenland (DKK kr.)
    • GrenadaGrenada (XCD $)
    • GuadeloupeGuadeloupe (EUR €)
    • GuatemalaGuatemala (GTQ Q)
    • GuernseyGuernsey (GBP £)
    • GuineaGuinea (GNF Fr)
    • Guinea-BissauGuinea-Bissau (XOF Fr)
    • GuyanaGuyana (GYD $)
    • HaitiHaiti (USD $)
    • HondurasHonduras (HNL L)
    • Hong Kong SARHong Kong SAR (HKD $)
    • HungaryHungary (HUF Ft)
    • IcelandIceland (ISK kr)
    • IndiaIndia (INR ₹)
    • IndonesiaIndonesia (IDR Rp)
    • IrelandIreland (EUR €)
    • IsraelIsrael (ILS ₪)
    • ItalyItaly (EUR €)
    • JamaicaJamaica (JMD $)
    • JapanJapan (JPY ¥)
    • JerseyJersey (USD $)
    • JordanJordan (USD $)
    • KazakhstanKazakhstan (KZT ₸)
    • KenyaKenya (KES KSh)
    • KiribatiKiribati (USD $)
    • KuwaitKuwait (USD $)
    • KyrgyzstanKyrgyzstan (KGS som)
    • LaosLaos (LAK ₭)
    • LatviaLatvia (EUR €)
    • LesothoLesotho (USD $)
    • LiechtensteinLiechtenstein (CHF CHF)
    • LithuaniaLithuania (EUR €)
    • LuxembourgLuxembourg (EUR €)
    • Macao SARMacao SAR (MOP P)
    • MadagascarMadagascar (USD $)
    • MalawiMalawi (MWK MK)
    • MalaysiaMalaysia (MYR RM)
    • MaldivesMaldives (MVR MVR)
    • MaltaMalta (EUR €)
    • MartiniqueMartinique (EUR €)
    • MauritaniaMauritania (USD $)
    • MauritiusMauritius (MUR ₨)
    • MayotteMayotte (EUR €)
    • MexicoMexico (USD $)
    • MoldovaMoldova (MDL L)
    • MonacoMonaco (EUR €)
    • MongoliaMongolia (MNT ₮)
    • MontenegroMontenegro (EUR €)
    • MontserratMontserrat (XCD $)
    • MoroccoMorocco (MAD د.م.)
    • MozambiqueMozambique (USD $)
    • NamibiaNamibia (USD $)
    • NauruNauru (AUD $)
    • NepalNepal (NPR Rs.)
    • NetherlandsNetherlands (EUR €)
    • New CaledoniaNew Caledonia (XPF Fr)
    • New ZealandNew Zealand (NZD $)
    • NicaraguaNicaragua (NIO C$)
    • NigeriaNigeria (NGN ₦)
    • NiueNiue (NZD $)
    • North MacedoniaNorth Macedonia (USD $)
    • NorwayNorway (USD $)
    • OmanOman (USD $)
    • PakistanPakistan (PKR ₨)
    • PanamaPanama (USD $)
    • Papua New GuineaPapua New Guinea (PGK K)
    • ParaguayParaguay (PYG ₲)
    • PeruPeru (PEN S/)
    • PhilippinesPhilippines (PHP ₱)
    • PolandPoland (PLN zł)
    • PortugalPortugal (EUR €)
    • QatarQatar (QAR ر.ق)
    • RéunionRéunion (EUR €)
    • RomaniaRomania (RON Lei)
    • RwandaRwanda (RWF FRw)
    • SamoaSamoa (WST T)
    • San MarinoSan Marino (EUR €)
    • São Tomé & PríncipeSão Tomé & Príncipe (STD Db)
    • Saudi ArabiaSaudi Arabia (SAR ر.س)
    • SenegalSenegal (XOF Fr)
    • SerbiaSerbia (RSD РСД)
    • SeychellesSeychelles (USD $)
    • Sierra LeoneSierra Leone (SLL Le)
    • SingaporeSingapore (SGD $)
    • SlovakiaSlovakia (EUR €)
    • SloveniaSlovenia (EUR €)
    • Solomon IslandsSolomon Islands (SBD $)
    • South AfricaSouth Africa (USD $)
    • South KoreaSouth Korea (KRW ₩)
    • SpainSpain (EUR €)
    • Sri LankaSri Lanka (LKR ₨)
    • St. BarthélemySt. Barthélemy (EUR €)
    • St. Kitts & NevisSt. Kitts & Nevis (XCD $)
    • St. LuciaSt. Lucia (XCD $)
    • St. MartinSt. Martin (EUR €)
    • St. Vincent & GrenadinesSt. Vincent & Grenadines (XCD $)
    • SurinameSuriname (USD $)
    • SwedenSweden (SEK kr)
    • SwitzerlandSwitzerland (CHF CHF)
    • TaiwanTaiwan (TWD $)
    • TanzaniaTanzania (TZS Sh)
    • ThailandThailand (THB ฿)
    • Timor-LesteTimor-Leste (USD $)
    • TogoTogo (XOF Fr)
    • TongaTonga (TOP T$)
    • Trinidad & TobagoTrinidad & Tobago (TTD $)
    • TunisiaTunisia (USD $)
    • Turks & Caicos IslandsTurks & Caicos Islands (USD $)
    • TuvaluTuvalu (AUD $)
    • UgandaUganda (UGX USh)
    • United Arab EmiratesUnited Arab Emirates (AED د.إ)
    • United KingdomUnited Kingdom (GBP £)
    • United StatesUnited States (USD $)
    • UruguayUruguay (UYU $U)
    • UzbekistanUzbekistan (UZS so'm)
    • VanuatuVanuatu (VUV Vt)
    • VietnamVietnam (VND ₫)
    • ZambiaZambia (USD $)
    Westside Barbell Westside Barbell Westside Barbell
    Search Account 0 Cart
    • New Arrivals
    • Shop
      Apparel
      Men’s Apparel Women’s Apparel Headwear T-shirts Cold Weather
      Merchandise
      Bags Posters & Banners Stickers & Patches Books Gift Cards
      Training Gear
      Barbells Lifting Belts Resistance Bands Wraps, Straps, & Support
    • Learn
      Blog
      Strength Training (All Blog) BJJ News Equipment Podcast
      Books & Downloads
      Books Downloads E-Books
      Conjugate Method Course
      Training Guides
      Conjugate Method 101 Louie Simmons Legacy
    • Memberships
      • Conjugate Club
      • Nitro AI
      • BJJ Strength Training (BridgeAthletic)
    • Get Certified
      • Culture & Assessment
      • Practical Execution
      • Conjugate Program Design
    • Sale
    Goes great with
    Sale
    Westside Barbell Mystery Apparel Sale price $12.50 Regular price $30.00 Save 58%
    Sale
    Mystery Westside Fleece Sale price $19.50 Regular price $50.00 Save 61%
    Stack of books titled 'Mystery' on a chain with a gray background-Westside Barbell
    Mystery Book $10.00
    Subtotal
    $0.00
    •  
    •  
    One or more of the items in your cart is a deferred, subscription, or recurring purchase. By continuing, I agree to the cancellation policy and authorize you to charge my payment method at the prices, frequency and dates listed on this page until my order is fulfilled or I cancel, if permitted.
    Shipping, taxes, and discount codes calculated at checkout.
    Your cart is currently empty.
    • New Arrivals
      • View all
        • View all
        • Men’s Apparel
        • Women’s Apparel
        • Headwear
        • T-shirts
        • Cold Weather
        • View all
        • Bags
        • Posters & Banners
        • Stickers & Patches
        • Books
        • Gift Cards
        • View all
        • Barbells
        • Lifting Belts
        • Resistance Bands
        • Wraps, Straps, & Support
        • Strength Training (All Blog)
        • BJJ
        • News
        • Equipment
        • Podcast
        • View all
        • Books
        • Downloads
        • E-Books
      • Conjugate Method Course
        • Conjugate Method 101
        • Louie Simmons Legacy
      • Conjugate Club
      • Nitro AI
      • BJJ Strength Training (BridgeAthletic)
      • View all
      • Culture & Assessment
      • Practical Execution
      • Conjugate Program Design
    • Sales
      Sale
    • Strength Training Articles
    ✕

    Optimal Bench Press Setup

    Optimal Bench Press Setup

    Burley Hawk Burley Hawk Conjugate Method | Bench | Exercise Programming | Featured | Strength Training Methods
    April 30th, 2022 7 minute read

    Learn to Coach Conjugate — Not Just Read About It

    THE LEVEL 1 DIGITAL INTERNSHIP IS OPEN

    The coaching process behind the Conjugate Method — how to assess athletes, select exercises, and make real-time adjustments. $150. Self-paced. 1-on-1 video calls from day one.

    <Enroll Now

    There's no doubt that you must develop optimal form and technique to lift the heaviest weights you can. Today, if you speak to practically any lifter, you will notice it is not uncommon for the average person to understand the idea that to lift your best, you must move your best. 


    So what qualifies as proper bench press form and technique? The truth is, it will always vary from lifter to lifter. If you are active on social media, you already know the constant emphasis on the correct form for the individual powerlifts. You'll see content discussing how to properly squat, bench, and deadlift with the promise that you will lift more and be less susceptible to injury if you follow these tips or cues.


    Unfortunately, this one size fits all approach is wrong and could be holding you back from improving your technique and adding weight to your lifts. When discussing, coaching, or evaluating an athlete's form, it is important to remember that no two athletes are the same. Bone density, bone length, joint size/structure, muscle mass, and muscle fiber type are all genetically unique to the individual. 


    This means that the idea of a one size fits all approach to the lifts is wrong, but it can also lead to less than optimal results or injury at worst. The goal of any coach should be to provide guidelines and parameters for athletes to follow, with the idea that as long as an athlete is properly guided, they will ultimately discover their optimal form. 


    Below, we will discuss some guidelines and parameters regarding form we utilize at Westside Barbell when teaching the bench press.


    Torso Positioning 


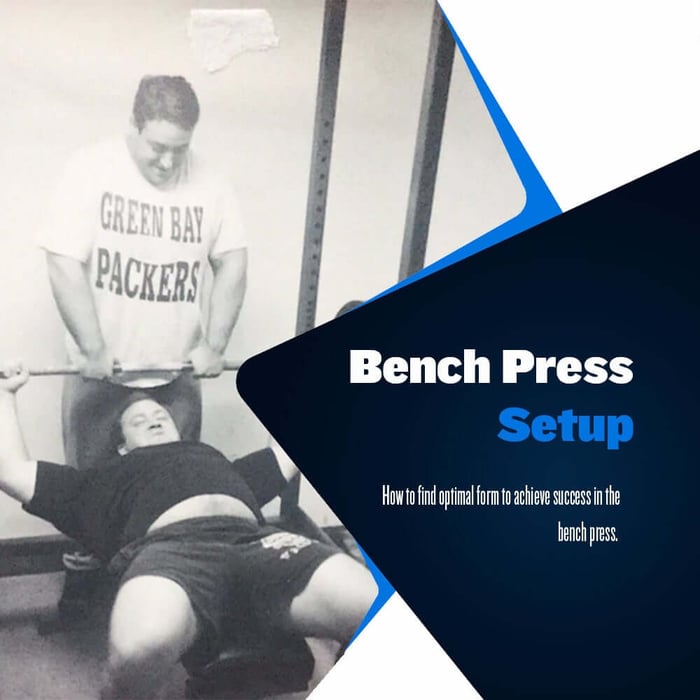
    When you first lay down on the bench, consider the circumstances. Will you be lifting off for yourself, or will someone be lifting the barbell out to you? This is important because it will determine where you need to begin setting up the torso on the bench.


    Torso positioning differs depending on whether you're lifting the bar out of the rack yourself or receiving a handout. If you have a handout, you can set the torso a bit more away from the uprights; however, if you are going to lift the weight out of the rack yourself, you will need to set your torso a bit closer to the uprights. 


    Initial torso placement is crucial if you are performing a self lift off. Failure to position yourself correctly will unnecessarily strain your shoulders and triceps as you attempt to perform a skullcrusher while unracking your max bench press. If you are having someone hand the weight to you, you can set your torso up wherever you feel most comfortable. 


    Find The Arch


    Once the torso has been positioned correctly, the next step is to set up an optimal bench arch. Arching the torso in the bench press is essential; an adequately executed arch reduces the distance the bar has to travel, and it will also help protect the shoulders and pecs. 


    There is much debate on the dangers of arching during a bench press. Determining an optimal arch for an individual depends on the torso length, size, and arm length of the lifter. Some lifters may have a more extreme arch, while some may have a less pronounced arch. There is no right or wrong; the game is optimal or suboptimal. 


    The most optimal form for you will be the one that reduces the travel of the barbell and helps protect the shoulders and pecs while allowing you to keep your glutes in contact with the bench. If those bases are covered, and you feel good while pressing the weight, you know you're on the right track.


    Setting the arch is simple. Once you have torso positioning determined, plant your upper back in the correct position based on the style of lift off you're using. Once that is achieved, you will contact the barbell with your hands to help lift your upper back off of the bench. From that point, you will begin arching your torso while trying to drive and set your upper back/traps/neck into the bench as securely as possible. 


    If the arch is correct, you should feel your upper back driving directly into the bench. This alleviates any risk of sliding up the bench and flattening out when leg drive is applied. 


    Determine Hand Positioning


    Hand positioning is another critical factor of the bench press. Similar to the other steps, this will differ depending on the lifter. The idea when positioning the hands is to place the triceps in the most optimal position during the press. 


    Another thing to consider when determining grip positioning is where your elbows are going. When you watch someone bench, you can see where their elbows travel in relation to the bench pad as they move the barbell. Imagine the bench pad as a line. Ideally, you want your elbows to move to the top of the pad when the barbell is on your chest. 


    If the elbows begin to travel below the bench pad "line," there will be added stress applied to the muscles and tendons of the shoulders and pecs. This problem is solved by coupling a proper arch with optimal hand positioning. 


    Arm length and arch will always determine where the elbows end up, so if you want to lower your risk of a pec or shoulder injury while benching, get your arch and hand positioning right.


    Set The Feet, Lock-In


    When setting up a bench press, the final step is to set the feet. How you place your feet should be based on what is best for you. However, it may be dictated by the federation in which you compete. If you compete in a federation that requires flat feet while benching, you have no choice but to train the bench while pressing with flat feet.


    For those of you lifting in federations that allow the feet to be set however you'd like, we recommend setting up on the balls of your feet. When setting the feet, you will ultimately need to reset the rest of your setup. However, considering you have already figured out where you need to be, the reset should be easy.


    We reset once we have our feet set because we want to create as much tension from our feet to our upper back as possible. The reset isn't drastic; we want to reset the upper back and potentially increase the torso arch to get as much drive from the feet to the upper back as possible. 


    Once the feet are set, and the upper back has been slightly repositioned, it is time to take in air and expand the diaphragm to become as stable as possible for the press. A great way to help create this pressure is with the help of a lifting belt. However, some find benching with a belt disruptive to their setup. 


    Guidelines Over Rules


    At Westside, we have long understood that for a lifter to perform at their best, they need to discover what works best for them. Attempting to fit every lifter you work with into the same movement patterns is ultimately a disservice to every lifter following your guidance. 


    The approach should be to provide guidelines and parameters for lifters to follow to find what feels most optimal to them. Truthfully, lifters should accomplish this within the first three months of barbell training. After that, the problem becomes addressing involved muscle group weaknesses that force a lifter out of optimal position. 


    If you have been training for a few years and still don't know how to properly squat, bench, or deadlift without risking catastrophic injury, you need to find a new coach. Whether you just started training or have been training for a while and still struggle with bench form, the suggestions described above will help get you on the right track.


    Don't fall into the trap of one size fits all form solutions; optimal form will look different from lifter to lifter. Find yours and watch your total increase rapidly. 


    Sources:

    Simmons, L. (2007). Westside Barbell Book of Methods. Westside Barbell.

    Verkhoshansky, Y., & Siff, M. C. (2009). Supertraining. Verkhoshansky.

    Zatsiorsky, V. M., & Kraemer, W. J. (2006). Science and Practice of Strength Training. Human Kinetics.

    « Back to Blog

    Related Articles

    Dynamic Effort Lower Advice for Football Players

    Dynamic Effort Lower Advice for Football Players

    6 minute read

    May 2nd, 2022

    Max Effort Upper for Offensive and Defensive Linemen

    Max Effort Upper for Offensive and Defensive Linemen

    5 minute read

    April 27th, 2022

    The Giant Cambered Bar: King of All Specialty Barbells

    The Giant Cambered Bar: King of All Specialty Barbells

    6 minute read

    May 4th, 2022

    Sign Up for 20% Off

    New releases and training updates in your inbox.

    Shop

    • Apparel
    • Merchandise
    • Training Gear

    Culture

    • Louie Simmons' Legacy
    • Meet The Team
    • Strength Training Blog
    • YouTube Channel
    • Podcast
    • The Conjugate Club

    Support

    • Contact Us
    • Returns
    • Check Gift Card balance

    My account

    • Log In
    • Create account

    Payment

    Payment methods: Visa, MasterCard, Discover, American Express, and PayPal.

    Shipping

    Orders shipped out within 1 - 5 business days.

    30 Days Return

    Simply return it within 30 days for an exchange. Note: During the BFCM sales period all sales are final.

    Facebook Instagram X / Twitter YouTube

    © 2026 Westside Barbell. All rights reserved.

    Privacy Policy Terms Of Service
    Westside Barbell